
How to make a transparent HTML and CSS HUD in Unreal Engine
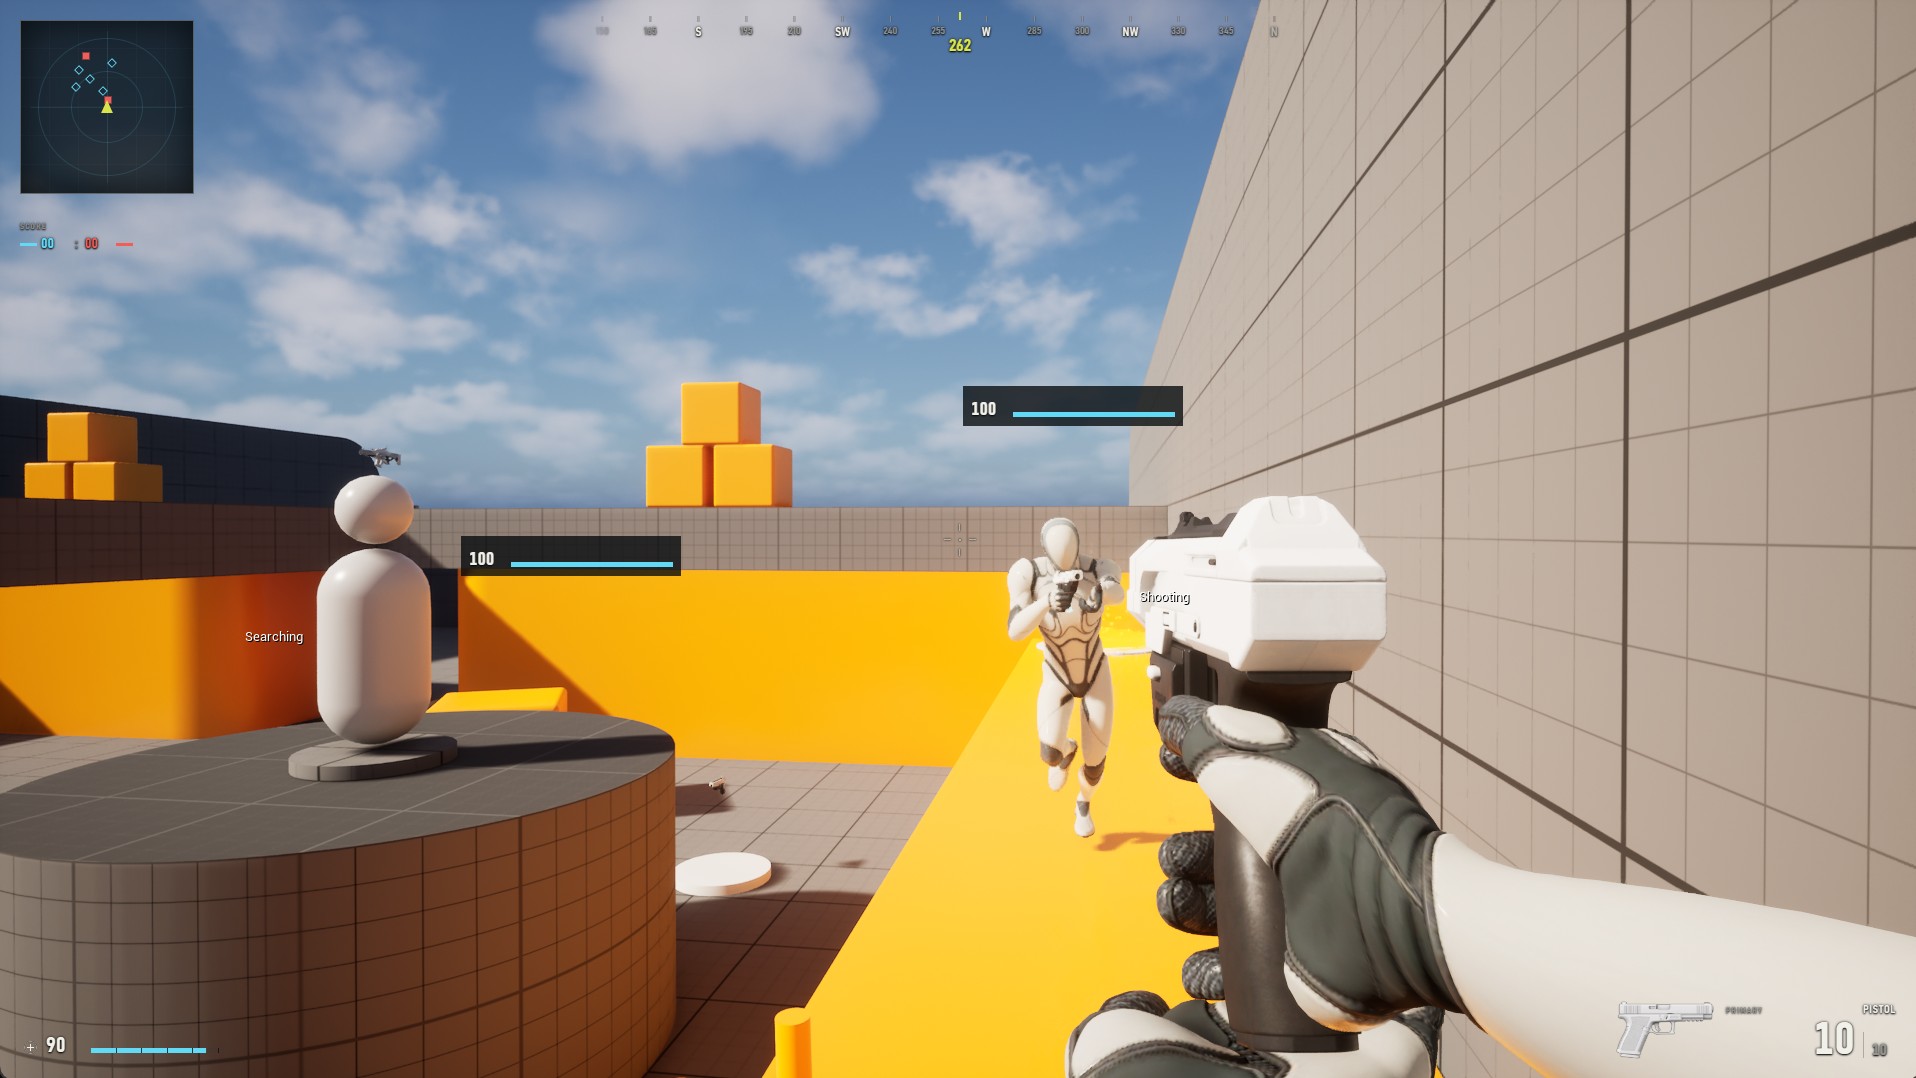
A HUD is a good first job for web UI in Unreal. You need layout that adapts to any resolution, crisp text, animation and a lot of small pieces of state. CSS handles all of that well, and you can style the whole HUD from one stylesheet instead of setting properties widget by widget in UMG.
This guide builds a transparent shooter HUD in plain HTML, CSS and JavaScript with Webkiln. No build tools or frameworks are needed. By the end you will have:
- A health bar, ammo counter and crosshair drawn over the game.
- Values pushed from Unreal whenever they change.
- Mouse clicks that reach the game everywhere except on real buttons.
- Sharp output at 4K.
Before you start
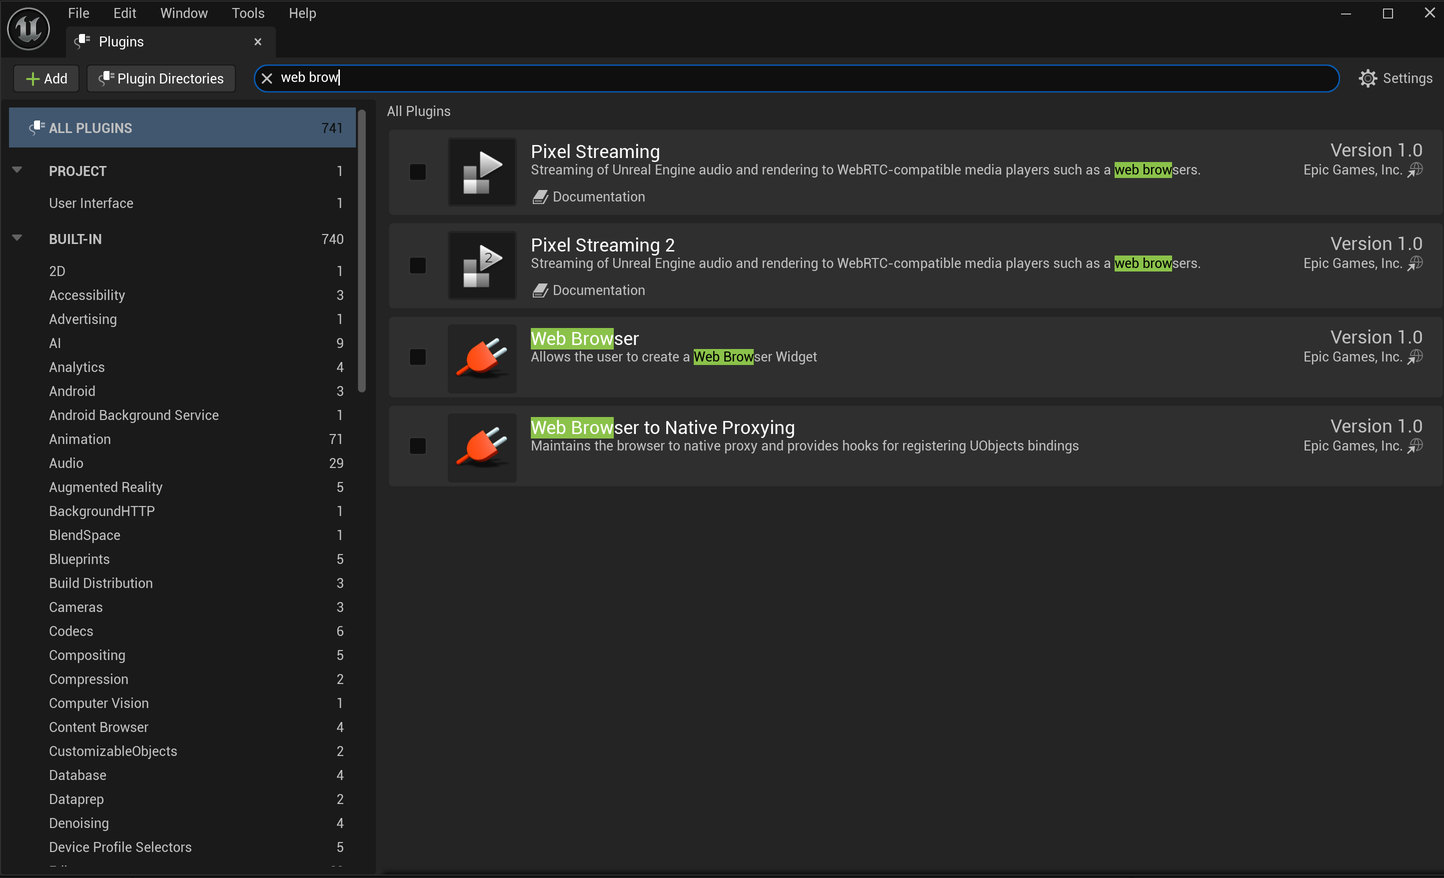
Install Webkiln in your project's Plugins folder and enable it under Edit > Plugins. Turn off Unreal's Web Browser and Web Browser Widget plugins, then restart the editor. The free trial supports Unreal Engine 4.25–5.8 on Windows.
1. Write the HUD page
Make a folder called WebUI in your Unreal project and add index.html:
 HTML
<!doctype html>
<html>
  <head>
    <meta charset="utf-8" />
    <link rel="stylesheet" href="hud.css" />
  </head>
  <body>
    <div class="crosshair"></div>

    <section class="vitals">
      <div class="health">
        <div class="health-fill"></div>
      </div>
      <output class="health-value">100</output>
    </section>

    <section class="ammo">
      <output class="clip">30</output>
      <span class="reserve">/ 90</span>
    </section>

    <script src="hud.js"></script>
  </body>
</html>
2. Style it with CSS
Add hud.css next to it. The background must stay transparent so the game shows through:
 CSS
:root {
  --accent: #ff7a3d;
  --danger: #e5383b;
  font-family: "Segoe UI", system-ui, sans-serif;
  color: #fff;
}

html, body {
  margin: 0;
  height: 100%;
  background: transparent;
  overflow: hidden;
}

.vitals {
  position: absolute;
  left: 3vw;
  bottom: 4vh;
  display: flex;
  align-items: center;
  gap: 1rem;
}

.health {
  width: clamp(180px, 18vw, 420px);
  height: 10px;
  background: rgb(255 255 255 / 15%);
  clip-path: polygon(0 0, 100% 0, 97% 100%, 0 100%);
}

.health-fill {
  height: 100%;
  width: calc(var(--health, 1) * 100%);
  background: var(--accent);
  transition: width 180ms ease-out, background-color 180ms;
}

.vitals.low .health-fill { background: var(--danger); }

.health-value,
.clip {
  font-size: clamp(24px, 2.4vw, 56px);
  font-variant-numeric: tabular-nums;
  text-shadow: 0 2px 8px rgb(0 0 0 / 60%);
}

.ammo {
  position: absolute;
  right: 3vw;
  bottom: 4vh;
}

.reserve { opacity: 0.6; }

.clip.empty { color: var(--danger); animation: pulse 600ms infinite alternate; }

@keyframes pulse { to { opacity: 0.35; } }

.crosshair {
  position: absolute;
  left: 50%;
  top: 50%;
  width: 18px;
  height: 18px;
  translate: -50% -50%;
  border: 2px solid rgb(255 255 255 / 85%);
  border-radius: 50%;
  pointer-events: none;
}
Sizes use vw, vh and clamp(), so the HUD scales with the game window without separate layouts for 1080p, 1440p and 4K.
3. Listen for game state
Add hud.js. Webkiln installs window.gameUI and fires webkiln:runtime-ready once it is available:
 JavaScript
const vitals = document.querySelector('.vitals');
const healthValue = document.querySelector('.health-value');
const clip = document.querySelector('.clip');
const reserve = document.querySelector('.reserve');

window.addEventListener('webkiln:runtime-ready', () => {
  gameUI.on('player.vitals', (health, maxHealth) => {
    const ratio = Math.max(0, health / maxHealth);
    vitals.style.setProperty('--health', ratio);
    vitals.classList.toggle('low', ratio < 0.25);
    healthValue.value = Math.ceil(health);
  });

  gameUI.on('weapon.ammo', (inClip, inReserve) => {
    clip.value = inClip;
    clip.classList.toggle('empty', inClip === 0);
    reserve.textContent = `/ ${inReserve}`;
  });

  gameUI.markReady();
});
markReady() tells Unreal the HUD is listening. Events sent before that are held and delivered in order, so the first values are never dropped.
4. Mount the folder
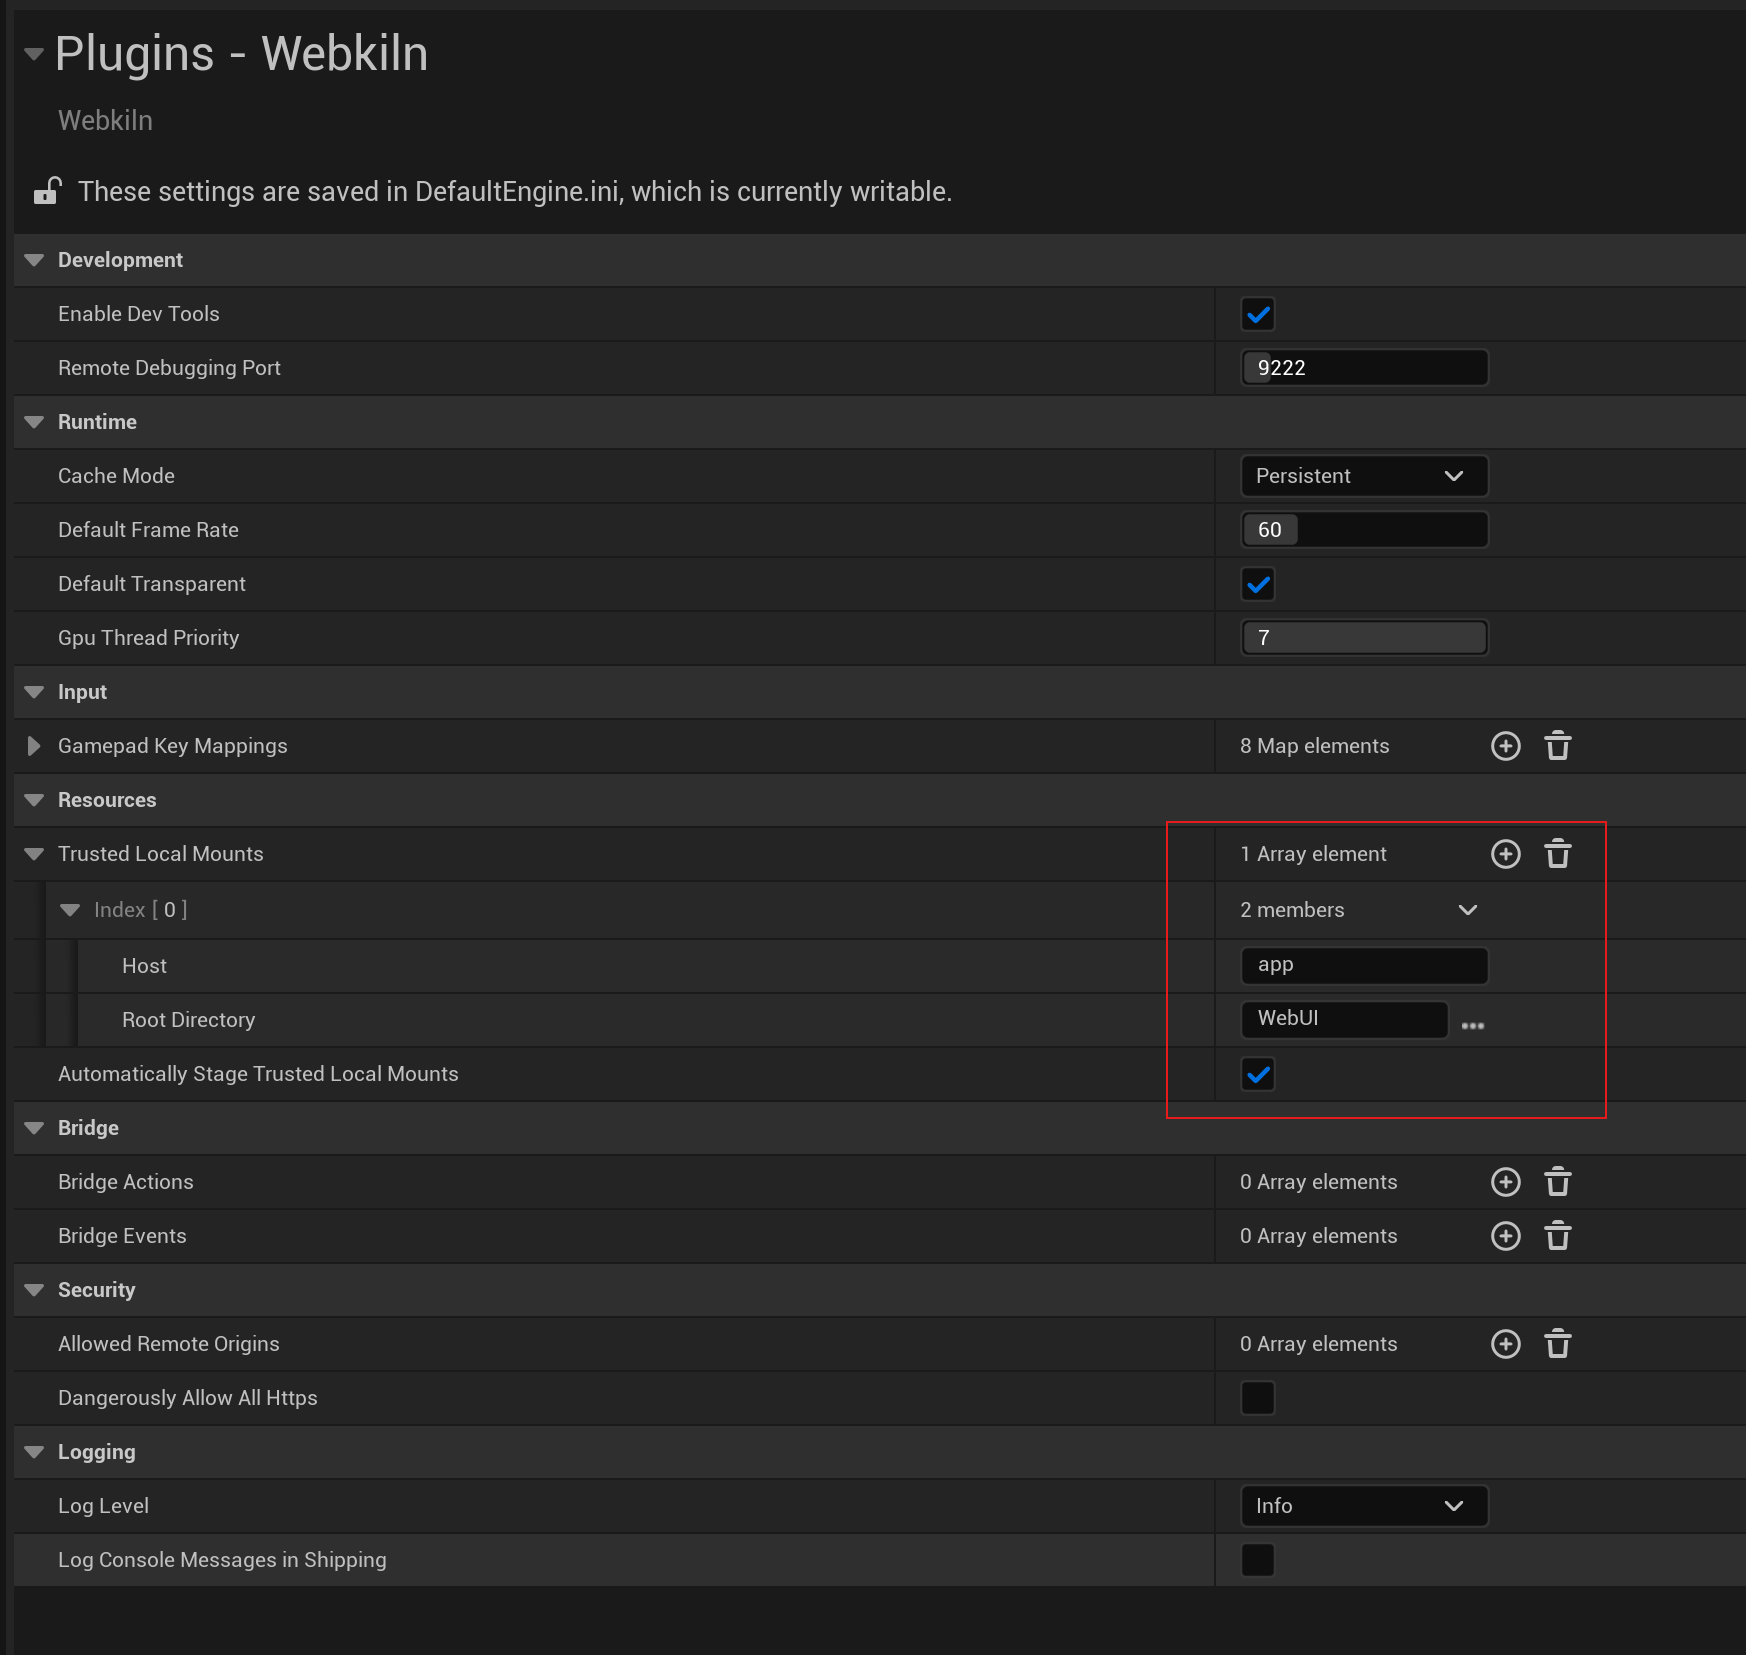
Open Project Settings > Plugins > Webkiln > Trusted Local Mounts and add host app pointing at WebUI. Restart the editor. The HUD is now at gameui://app/index.html, in the editor and in packaged builds.
5. Put it on the screen
Create a transparent view and add it to the viewport. For example, in your player controller's BeginPlay:
 C++
UWebkilnSubsystem* Webkiln = GetGameInstance()->GetSubsystem<UWebkilnSubsystem>();

FWebkilnViewInitParams Params;
Params.ViewId = TEXT("HUD");
Params.EntryPoint = TEXT("gameui://app/index.html");
Params.bUseDefaultTransparency = false;
Params.bTransparent = true;

UWebkilnView* View = Webkiln->CreateViewAsync(Params);

UWebkilnWidget* Widget = CreateWidget<UWebkilnWidget>(this);
Widget->SetView(View);
Widget->AddToViewport();
Add Webkiln to PrivateDependencyModuleNames in your Build.cs. In Blueprint, use Create View, a Webkiln Widget, Set View and Add to Viewport. The getting started guide has the full graph.
6. Send health and ammo from Unreal
Whenever a value changes, push an event to the HUD view. The C++ event API passes each value as a separate argument to the JavaScript callback:
C++void AMyPlayerController::OnHealthChanged(float Health, float MaxHealth)
{
UWebkilnSubsystem* Webkiln = GetGameInstance()->GetSubsystem<UWebkilnSubsystem>();
Webkiln->DispatchEngineEventToView(TEXT("HUD"), TEXT("player.vitals"), {
FWebkilnEngineEventValue::Number(Health),
FWebkilnEngineEventValue::Number(MaxHealth),
});
}
void AMyPlayerController::OnAmmoChanged(int32 InClip, int32 InReserve)
{
UWebkilnSubsystem* Webkiln = GetGameInstance()->GetSubsystem<UWebkilnSubsystem>();
Webkiln->DispatchEngineEventToView(TEXT("HUD"), TEXT("weapon.ammo"), {
FWebkilnEngineEventValue::Number(InClip),
FWebkilnEngineEventValue::Number(InReserve),
});
}Send events when values change, not every tick. In Blueprint, Dispatch Webkiln Event (Struct) on the view sends a whole struct as one JSON object instead.
7. Keep clicks going to the game
A HUD covers the whole screen. Webkiln already passes clicks on html and body through to the game. If you wrap the HUD in a full-screen container, mark it as background with data-webkiln-world-input so the player can still shoot and look around:
HTML<main class="hud" data-webkiln-world-input>
<button class="menu">Menu</button>
</main>The button still receives clicks, and everything else goes to gameplay. Decorative elements such as the crosshair use pointer-events: none. The click-through reference covers drags and dynamic changes.
8. Keep it sharp at 4K
Leave the view's width and height at zero and it matches the game window, so the HUD is rendered at native resolution and text stays crisp at 4K. Webkiln renders on the GPU and only paints when the page changes, so a HUD that is sitting still costs no new frames.
If you render the game at a lower internal resolution, Render Scale on the view sets the HUD's texture size independently of its CSS layout.
Check it in DevTools
Press Play, open the console with ~ and run Webkiln.OpenDevTools. You can edit hud.css live in the Elements panel and see the result over the running game, then copy the changes back to your file.
Where to go next
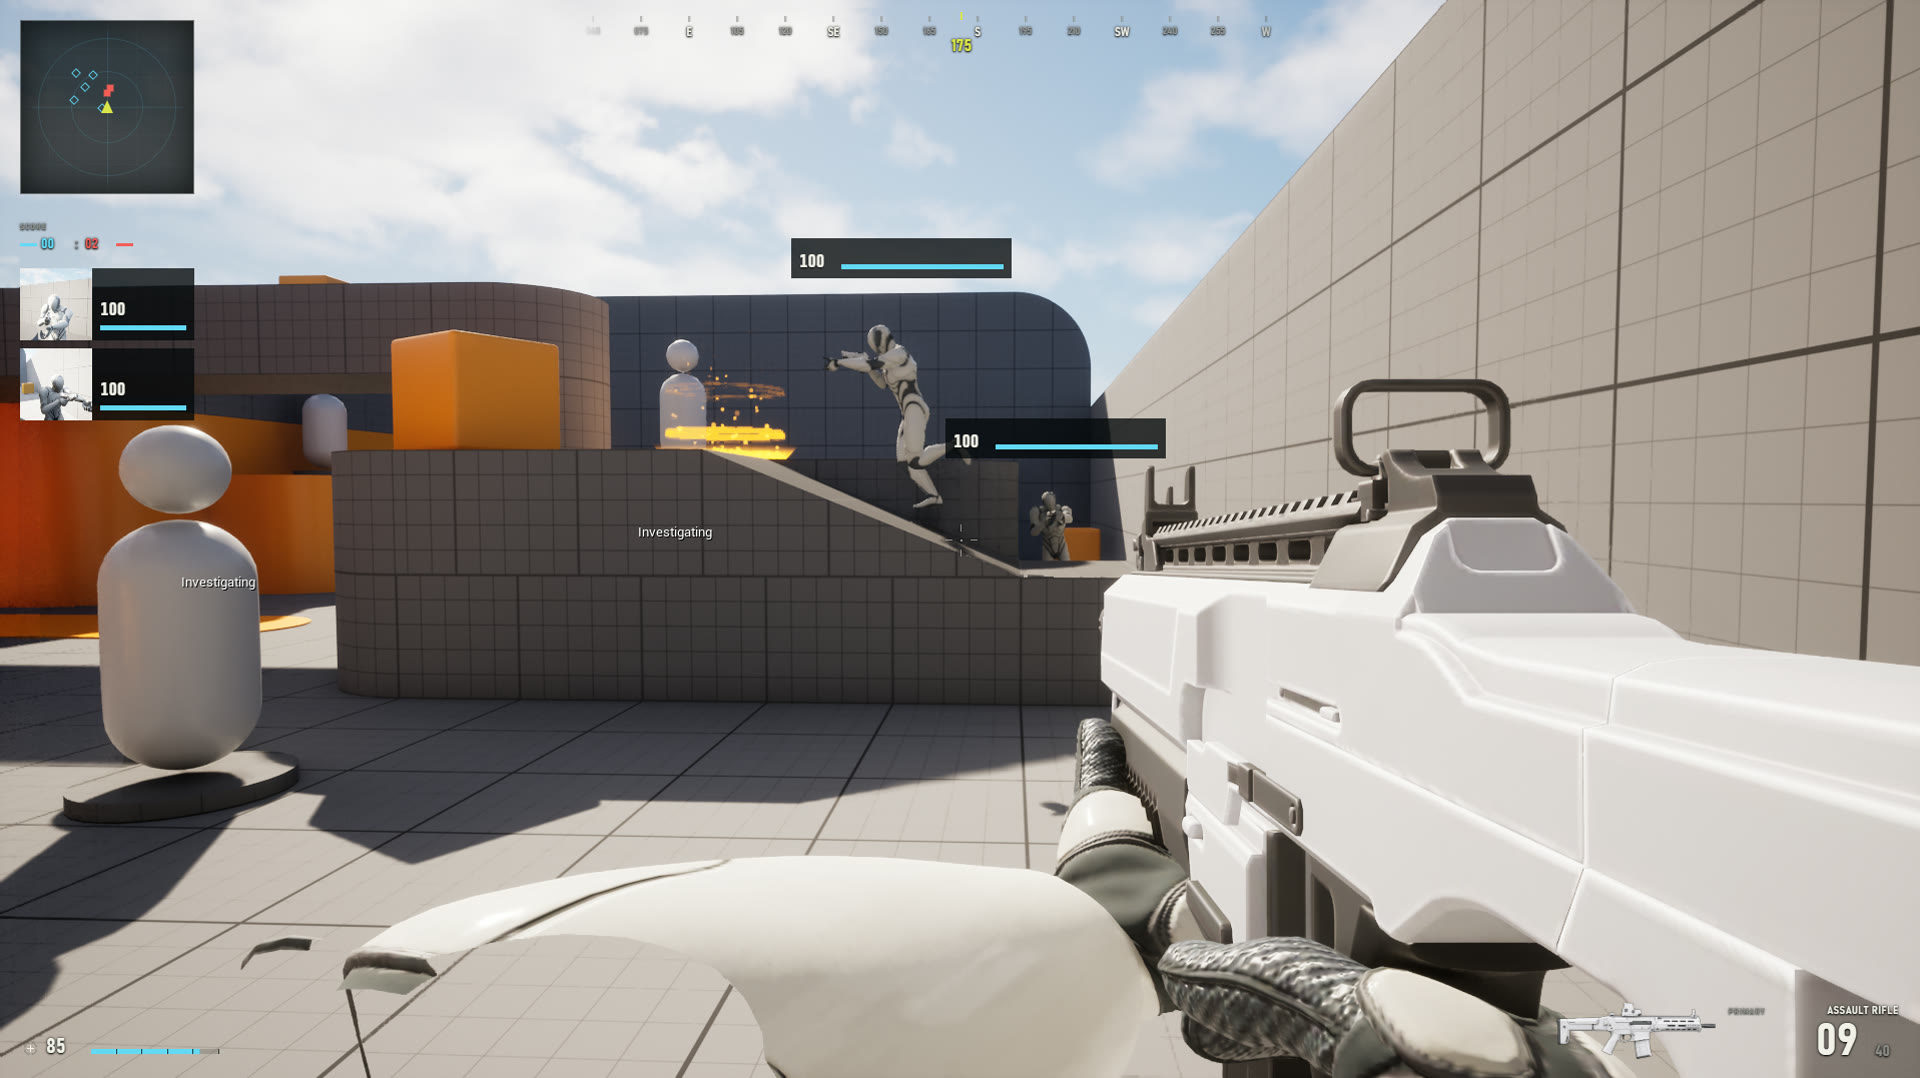
- Show live Unreal textures in the HUD, for example a minimap render target or enemy portraits.
- Pin labels and health bars to actors so they stay locked to the world every frame.
- Build the same HUD with React when the UI grows into menus and inventories.